Stuffed Pumpkin

posted in: Fall Crafts, Stuffed Pumpkin | 0


Supplies

22″ Square piece of material

Rubber Bands

Stuffing

Burlap Pumpkin

Burlap

Hot Glue Gun

Brown Top Pumpkin

Brown Felt

Brown Ribbon

Brown Thread

Craft Glue


Stuffed Pumpkin1


Cut a 22″ piece of fabric.  This will make a pumpkin approximately 6″ tall and 27″ around

Stuffed Pumpkin2


Add enough stuffing to fill the pumpkin.  Using the rubber bands, hold the stuffing together to make a pumpkin shape.

Stuffed Pumpkin3


Starting at one corner, start gathering the fabric around until you are holding all the ends together

Stuffed Pumpkin5


Put a rubber band at the top of the stuffing, pulling the fabric tight into the rubber band.

Stuffed Pumpkin6


Fold down the fabric and put another rubber band around the top stem.  This should be around 3 inches.


For the Burlap Pumpkin

  1. Using a flat piece of burlap, fold both ends in and tightly fit the burlap around the pumpkin stem
  2. Put hot glue along one of the folded ends of the burlap.
  3. Hold the ends together until the glue is set.
  4. Glue the top closed
  5. Tie a ribbon with the burlap that fits just above the pumpkin

Stuffed Pumpkin7

Stuffed Pumpkin8

Stuffed Pumpkin10

Stuffed Pumpkin11


For the Brown Stem Pumpkin

Stuffed Pumpkin12

Stuffed Pumpkin13

Stuffed Pumpkin14

  1. With the brown felt, cut a piece that fits snuggly around the stem
  2. Using a needle and thread, sew the sides and top together, leaving the bottom open.
  3. Put craft glue on the stem, then put the brown felt sleeve over the stem, pulling it all the way down to the pumpkin.  Put some glue under the edges to hold them secure to the pumpkin.
  4. Tie a ribbon around the stem that sits just above the pumpkin.

Stuffed PumpkinBurlap

Stuffed Pumpkin Brown


Print Friendly, PDF & Email

Dryer Vent Pumpkin

posted in: Crafts, Dryer Vent Pumpkin, Fall Crafts | 0
Dryer Vent Pumpkins - multi
I love these Dryer Vent Pumpkins.  They are so easy to make and the look fantastic. I used orange, black and off-white paint.  As far as the embellishments are concerned, anything goes. 
Supplies
Metal Dryer Vent
Scissors
Wire Cutters
Spray Paint
Hot Glue Gun
Ribbon
Moss
Raffia
Cinnamon Sticks
Floral Pics


Instructions
Holding both sides together, start hot gluing them together. Using the hot glue gun, glue a small area at a time and hold it until the glue sets.

Continue holding the vent together until all the glue has set.  If there is any section that is not holding together, go back and insert more hot glue and hold it closed again.*If you are not comfortable using a hot glue gun, you can use a needle and thread and sew the 2 wires together.

Dryer Vent1

Dryer Vent2

Dryer Vent4

Dryer Vent5


I used Rust-oleum to paint the vents.  It took two coats, but covered very well.  When the vent is dry, look it over carefully to make sure that you didn’t miss any spots.  I did find it easier to hang the vent from a pole so it didn’t stick to the newspaper.

Dryer Vent6

Dryer Vent7


Once the vents have dried completely, now you can start decorating them.  I used sticks from my yard as well as cinnamon sticks for the stem.  On one of them, I let the floral pic be the stem.  I used raffia and scarecrow picks.  On the black ones, I just put a bow and glued some spiders from the dollar store.  The possibilities are endless.

Dryer Vent Pumpkin Candy Corn Bow

Dryer Vent Pumpkin - Black

Pumpkin Beige

Pumpkin Scarecrow

Print Friendly, PDF & Email

Ghost Windsock

posted in: Ghost Windsock | 0

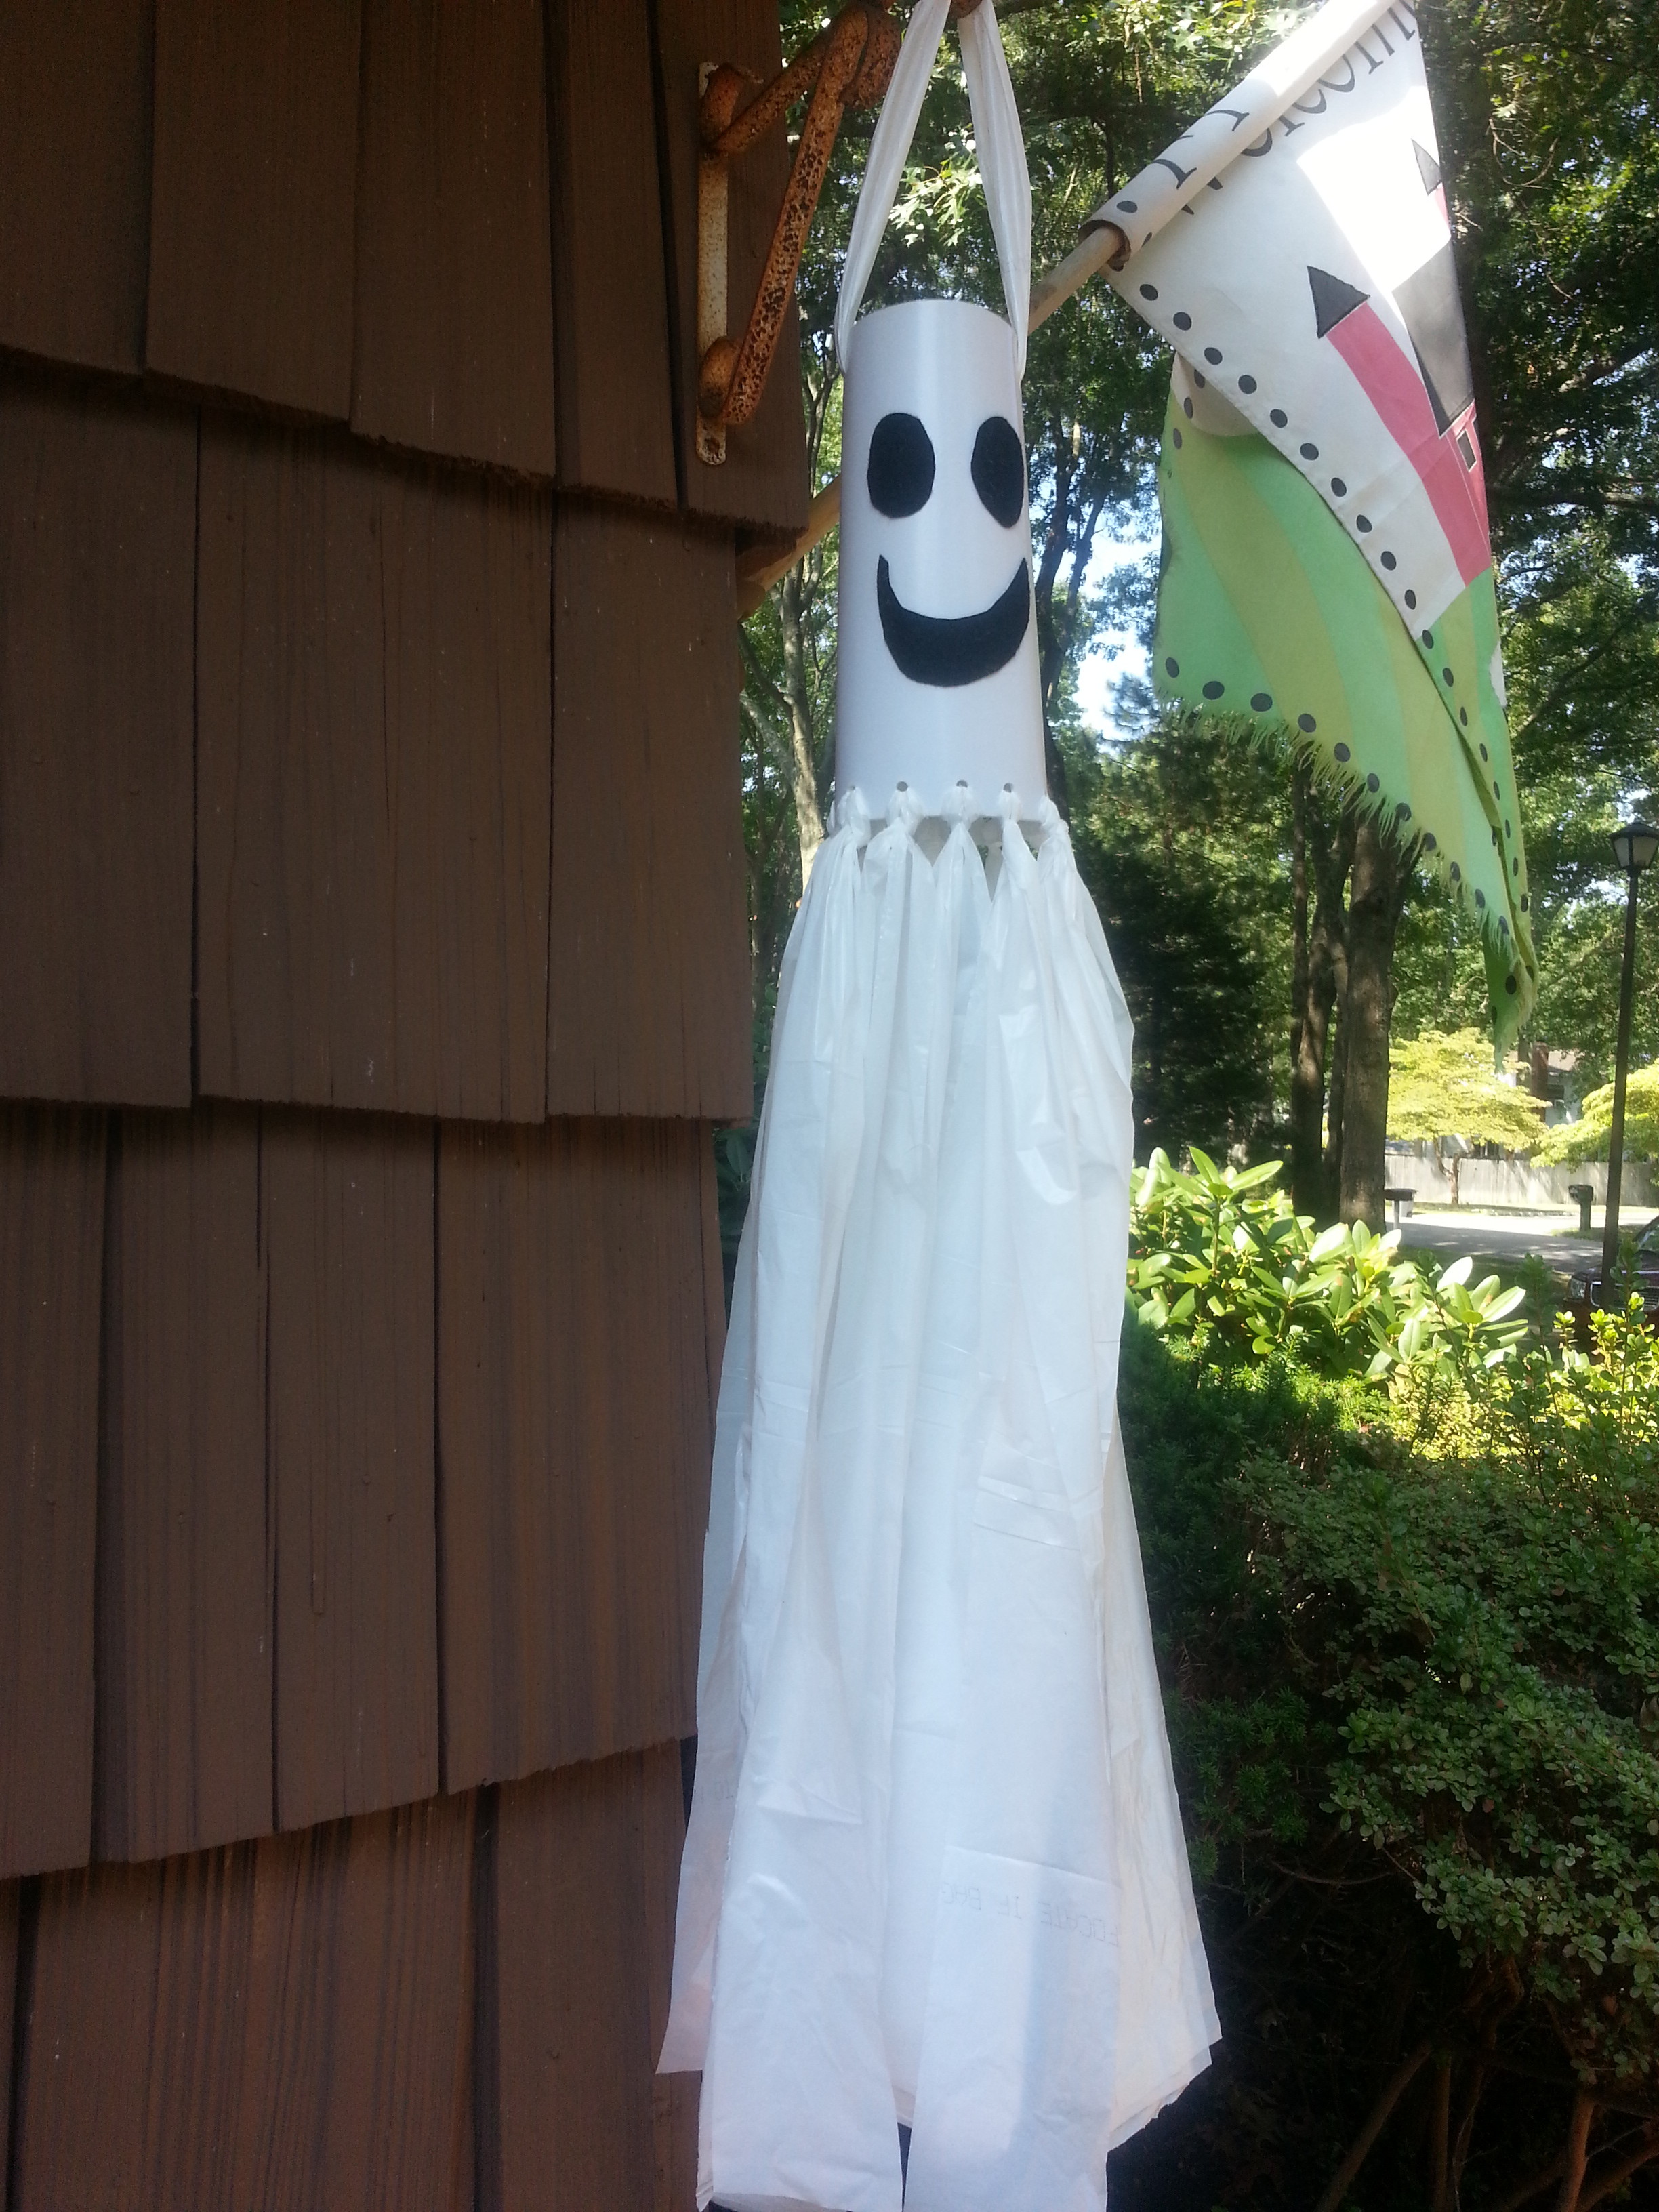
Ghost Windsock

This is a great craft to make with kids.  If you are a Girl or Boy Scout Leader, this is a craft that everyone would like to make. I taught a class of kids ranging in age from kindergarten through fourth grade and they all loved making it and displaying it at their homes. This takes less than an hour to make and it is very economical.


Supplies

One sheet of white, adhesive backed foam (81/2 x 11)

2 Tall white kitchen garbage bags cut into strips

1 Black sheet of adhesive backed felt


Hole Puncher

Scissors

Stapler

Ghost WS1

Ghost WS2

Punch 9 holes in the lower edge of the white craft foam.  Holding the edges together, staple the long sides together. Punch one more hole in the lower edge where you stapled it to have the holes all along the bottom edge.  10 holes total.

Ghost WS6

Ghost WS3

With the black adhesive backed felt, cut out eyes and a mouth and stick them onto the windsock.  Cut the top and sides off the tall kitchen garbage bags. Don’t cut through the bottom. Cut each bag into 8 strips.  You will only be using 11 of them.


Ghost WS4

Ghost WS5

Ghost WS5:1

Open 10 strips of the plastic bag and pull the middle through each hole making a loop.  Then, take the ends an pull them through the loop.  Pull them tight so they lay flat on the windsock.  Continue through all 10 holes so there is a strip in each hole.

Ghost WS7

Ghost WS8

Ghost WS9

At the top end of the windsock, punch 2 holes.  One on each side so the face is directly in front.  Using one strip from the garbage bag, put one end in each hole and pull it through.  Tie the ends together and pull the bag so the knot is inside the windsock, flush with the side.

Print Friendly, PDF & Email

Burlap Covered Mason Jars

posted in: Burlap Covered Mason Jars | 4

Picture

These Mason jars are so versatile. Here I have them with silverware in them, but I also put candles or fresh flowers in them.  They are fantastic.

Supplies
Mason Jar
Burlap
Beads
Little flat flower middles
Ribbon
Hot glue gun
Instructions
First, wrap the burlap around the mason jar.  Put a line of hot glue on the jar first, then  secure one end to the jar.  Hold the burlap in place for a minute, until the glue is secure.  Then put a line of hot glue on the burlap to secure the other end. Hold in place until it is secure. 
As you can see from this picture, I first tried a piece of twine for the bow at the top.  It looked ok, but I decided to change it after I put the beads on the jar.  Try the twine or a piece of ribbon that coordinates with the color of your beads and see which one you like better.  I ended up with the brown ribbon.
The beads I had here were in the shape of a tear drop.   They fit perfectly together to make the pedals of a flower.  In the center, I had flat medal circles that I purchased in the bead section at my craft store.  They worked great in the middle of the flower.  You could also use a colored jewel.  As long as the back is flat, you will be fine.  I have 5 flowers around the jar.  Depending on what size beads you use, you will need a different amount of flowers.  

Print Friendly, PDF & Email

Floral Wreath

posted in: Floral Wreath | 0

PictureThis is a beautiful wreath outside my front door.  What and eye catcher!!  It is not only beautiful, but so simple to make.  This is a craft that will take you an hour to complete.  


Supplies
1 straw wreath
Floral picks in different sizes and colors
Coordinating ribbon
Floral Pins
Scissors


Instructions
Cover the straw wreath with ribbon.  Use a floral push pin to secure the ends into the wreath.  
Start with the inside and work out with the floral picks.  I used a small flower to go around the middle part of the straw wreath, then I used carnations for the middle, then smaller airy flower around the largest part of the wreath.  **Straw wreaths come in many sizes.  You will need the amount of flowers to cover your wreath.  I used a 10″ wreath here and I used approximately 10 small flowers, 15 carnations and 40 smaller airy flowers around the largest part.
Use the scissors to poke holes through the ribbon so you can push the flowers into the wreath.  
Regardless of what type of flowers you use, you will need to cover the entire wreath.  Once it is covered you can add a large or small bow.  I have a small one here because the wreath is so colorful.  If you are using only one type of flower, you will need a more colorful and a larger bow.  


Print Friendly, PDF & Email