Spring

posted in: Home Decor | 0

Wedding Centerpiece

I know that I am a little late with this because it’s almost Summer, but I’ll say it anyway….HAPPY SPRING!!!

It has been crazy busy around here starting with Easter.   In the last 6 weeks, I had a wedding, shower, graduation, dance recital, award ceremony, 4 birthdays along with Mother’s Day and Father’s Day coming up.  I am so blessed to have such an amazing family to share my life with.

In my spare time, I’ve been trying to spruce up the house for the Summer.  The picture above is of the centerpiece from the wedding I went to. Not only were the flowers gorgeous, but wait until you see how I repurposed the base.  

As far as the rest of the house goes, I didn’t do much, just some flowers here and there and moved some things from one room to another.  I find that when you use things in a different way and pair them with other things, they take on a whole new look and feel.  I’ll show you what I mean.

My vegetable garden is in full swing.  I planted the basics, tomatoes, cucumbers, zucchini, eggplant and herbs.  I did add lettuce this year that looks great.  Everything is growing beautifully. 

Take a look at the Home Decor and the Gardening tabs to see what I’ve been working on.



Print Friendly, PDF & Email

Basic Burlap Wreath

posted in: Crafts, Home Decor | 0

Burlap Wreath FinishThis is a basic burlap wreath.  It’s a staple for almost any style decor.  It’s a neutral color that can be enhanced with ribbons and embellishments.  Once you have the basic wreath, the ribbons and embellishments can be changed to match your decor, seasons and holidays.


Supplies

Metal Wreath Form

Burlap

Wire or Glue Gun


Instructions

Burlap Wreath1


Attach the burlap to the wreath form.  You can use a piece of wire or you can fold over the end and use a glue gun to secure the end. 

Burlap Wreath2


Now, this part is a little tricky.  Pull the burlap up into the first ring of the wreath form approximately 1 1/2 inch above the form to make a loop.  Pull the burlap into the second ring, then the third so you have burlap 3 loops.  

Burlap Wreath3


Now, you need to push the three burlap loops to the end of the wreath.  Turn the wreath to the back and twist the burlap so it stays in place.  Repeat the process of making three loops, twisting the burlap,  then pushing them to the end.  Fill the entire wreath form in the same manner until it is completely full with burlap loops.  


When the entire wreath is full, secure the end around one of the metal rings from the wreath and secure the end with a piece of wire or with a hot glue gun.

Print Friendly, PDF & Email

Heart Picture

posted in: Crafts | 0

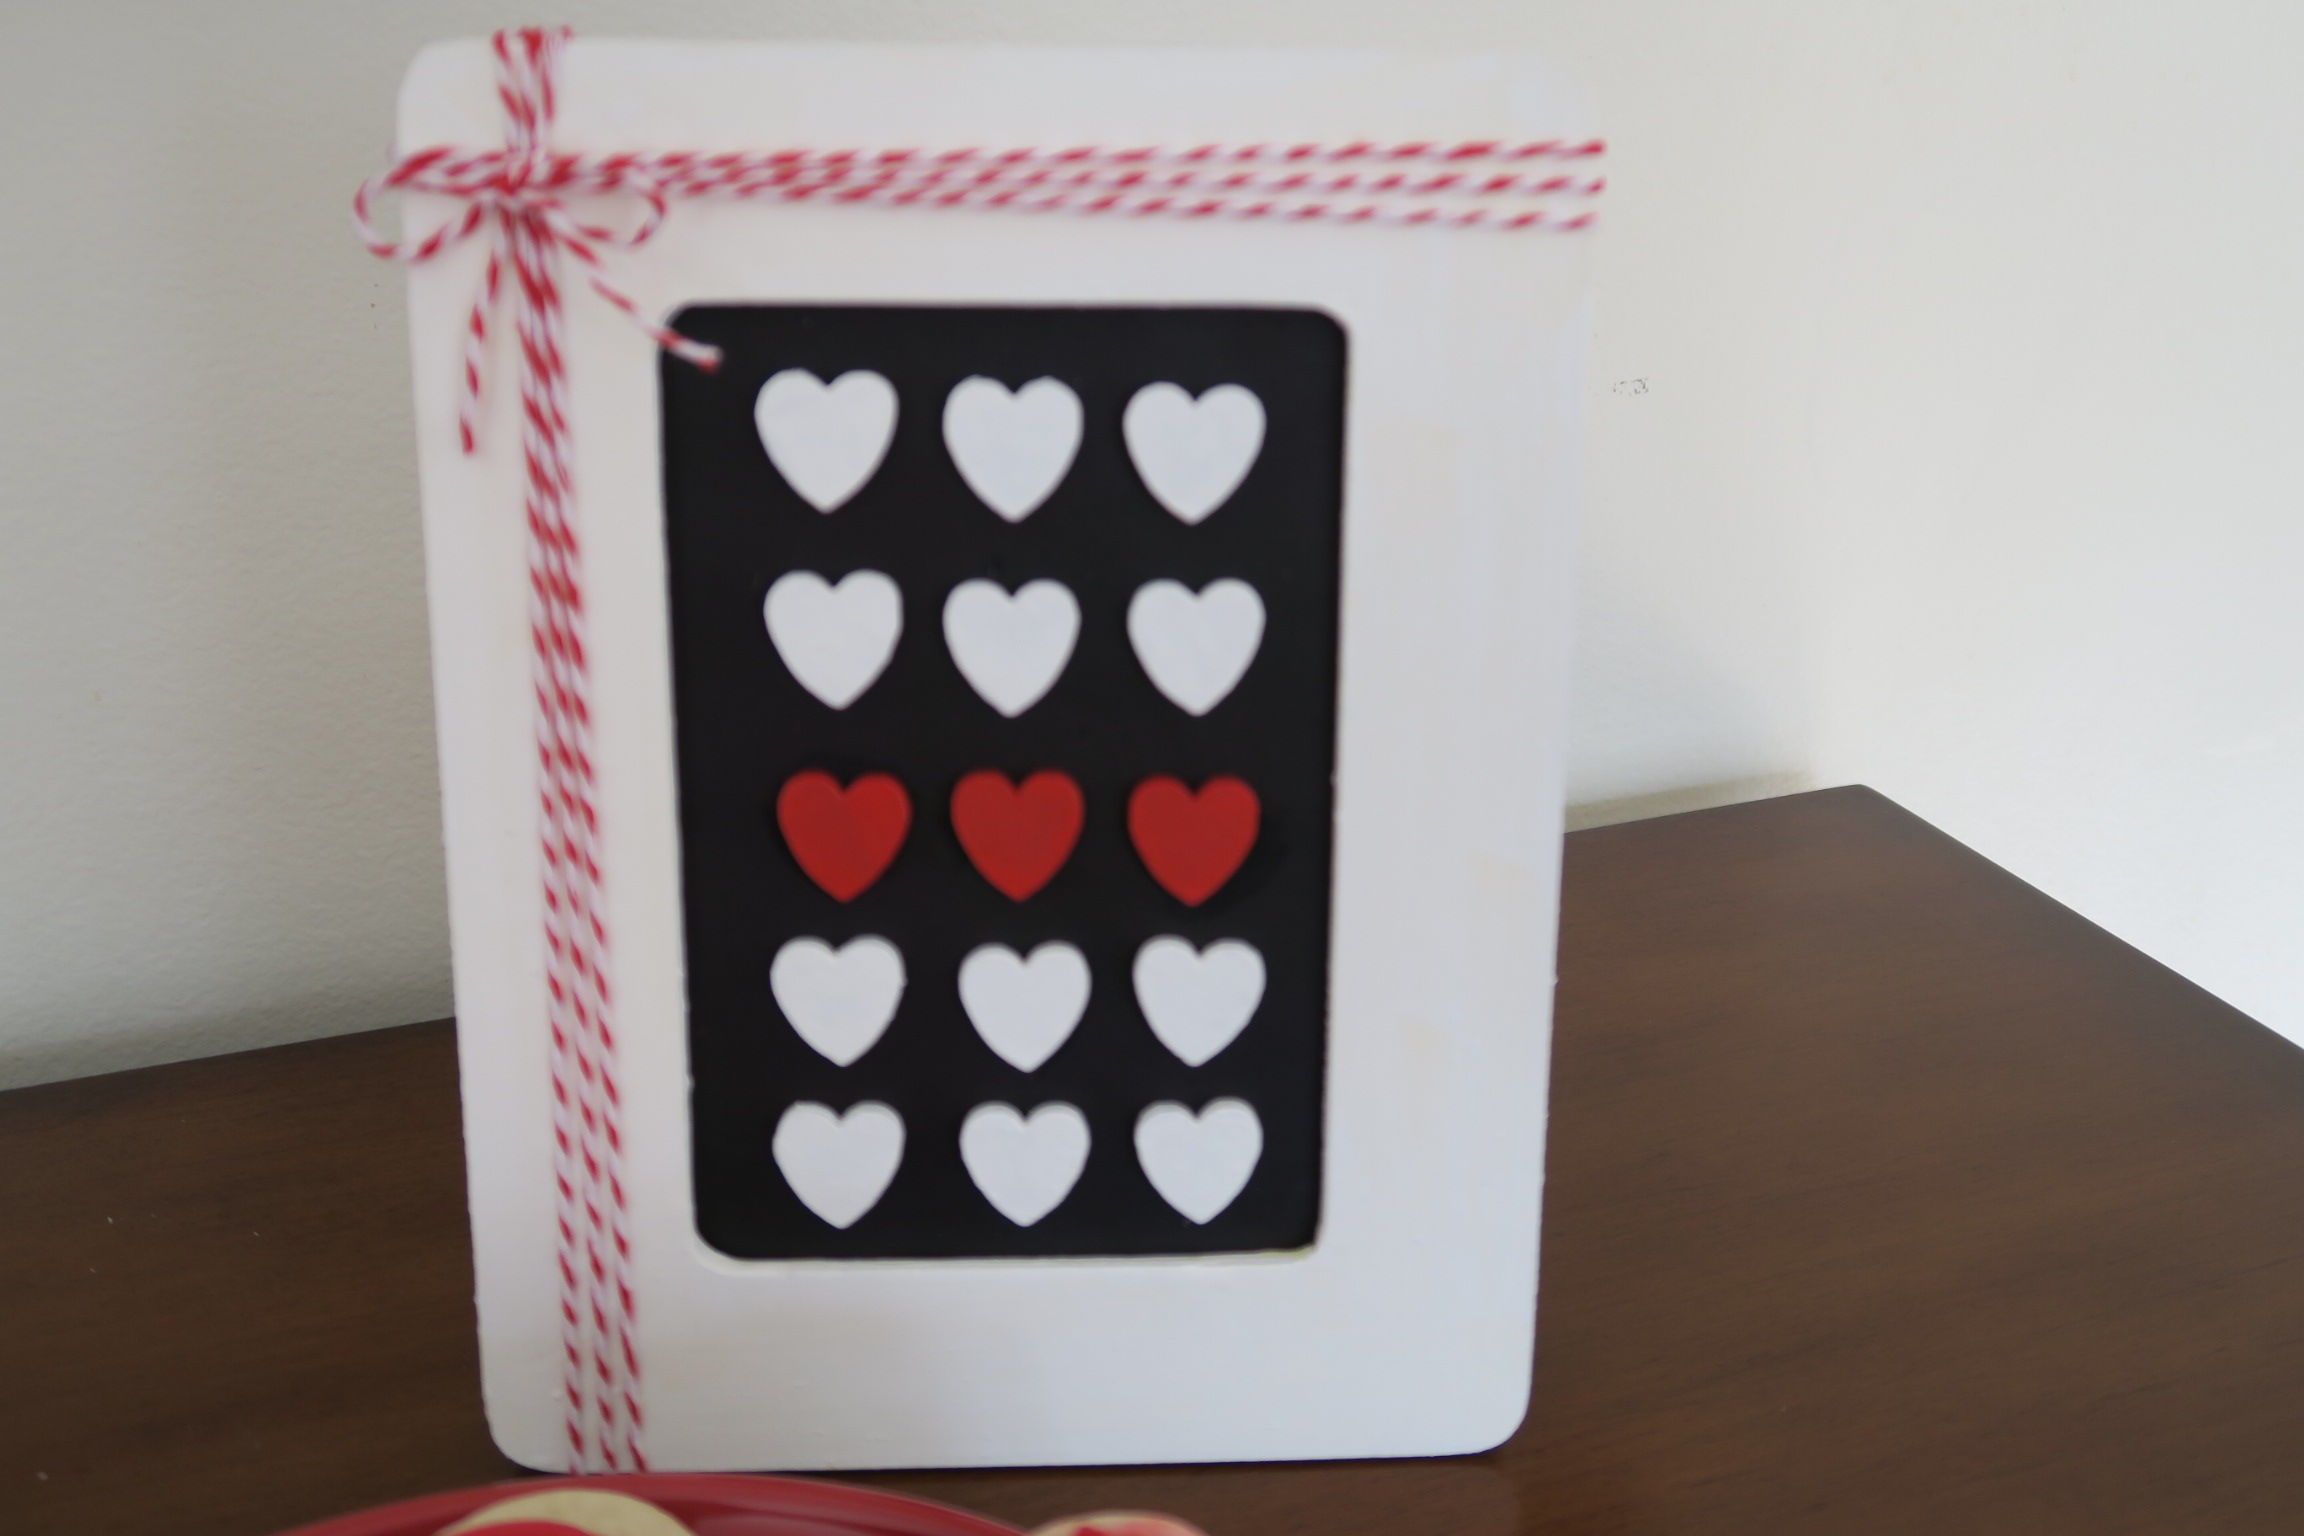
Valentine Heart FinishWhat a simple picture.  You can change the colors to go with any color scheme, or just make it red and white and display it around Valentine’s Day.  Simple and easy, it doesn’t get better than that.


Supplies

Picture Frame – I got this one for $1 at Michaels

White Craft Paint

Red Craft Paint

2 Paint Brushes

15 Wood Hearts

Bakers Twine

Black Card Stock

Craft Glue


Instructions

  1.  Paint the frame white.  Let dry completely
  2.  Cut 2 pieces of black card stock to fit the opening in the front and back of the frame.  Put in the frame.
  3.  Paint 12 hearts white and 3 hearts red.  Let dry completely
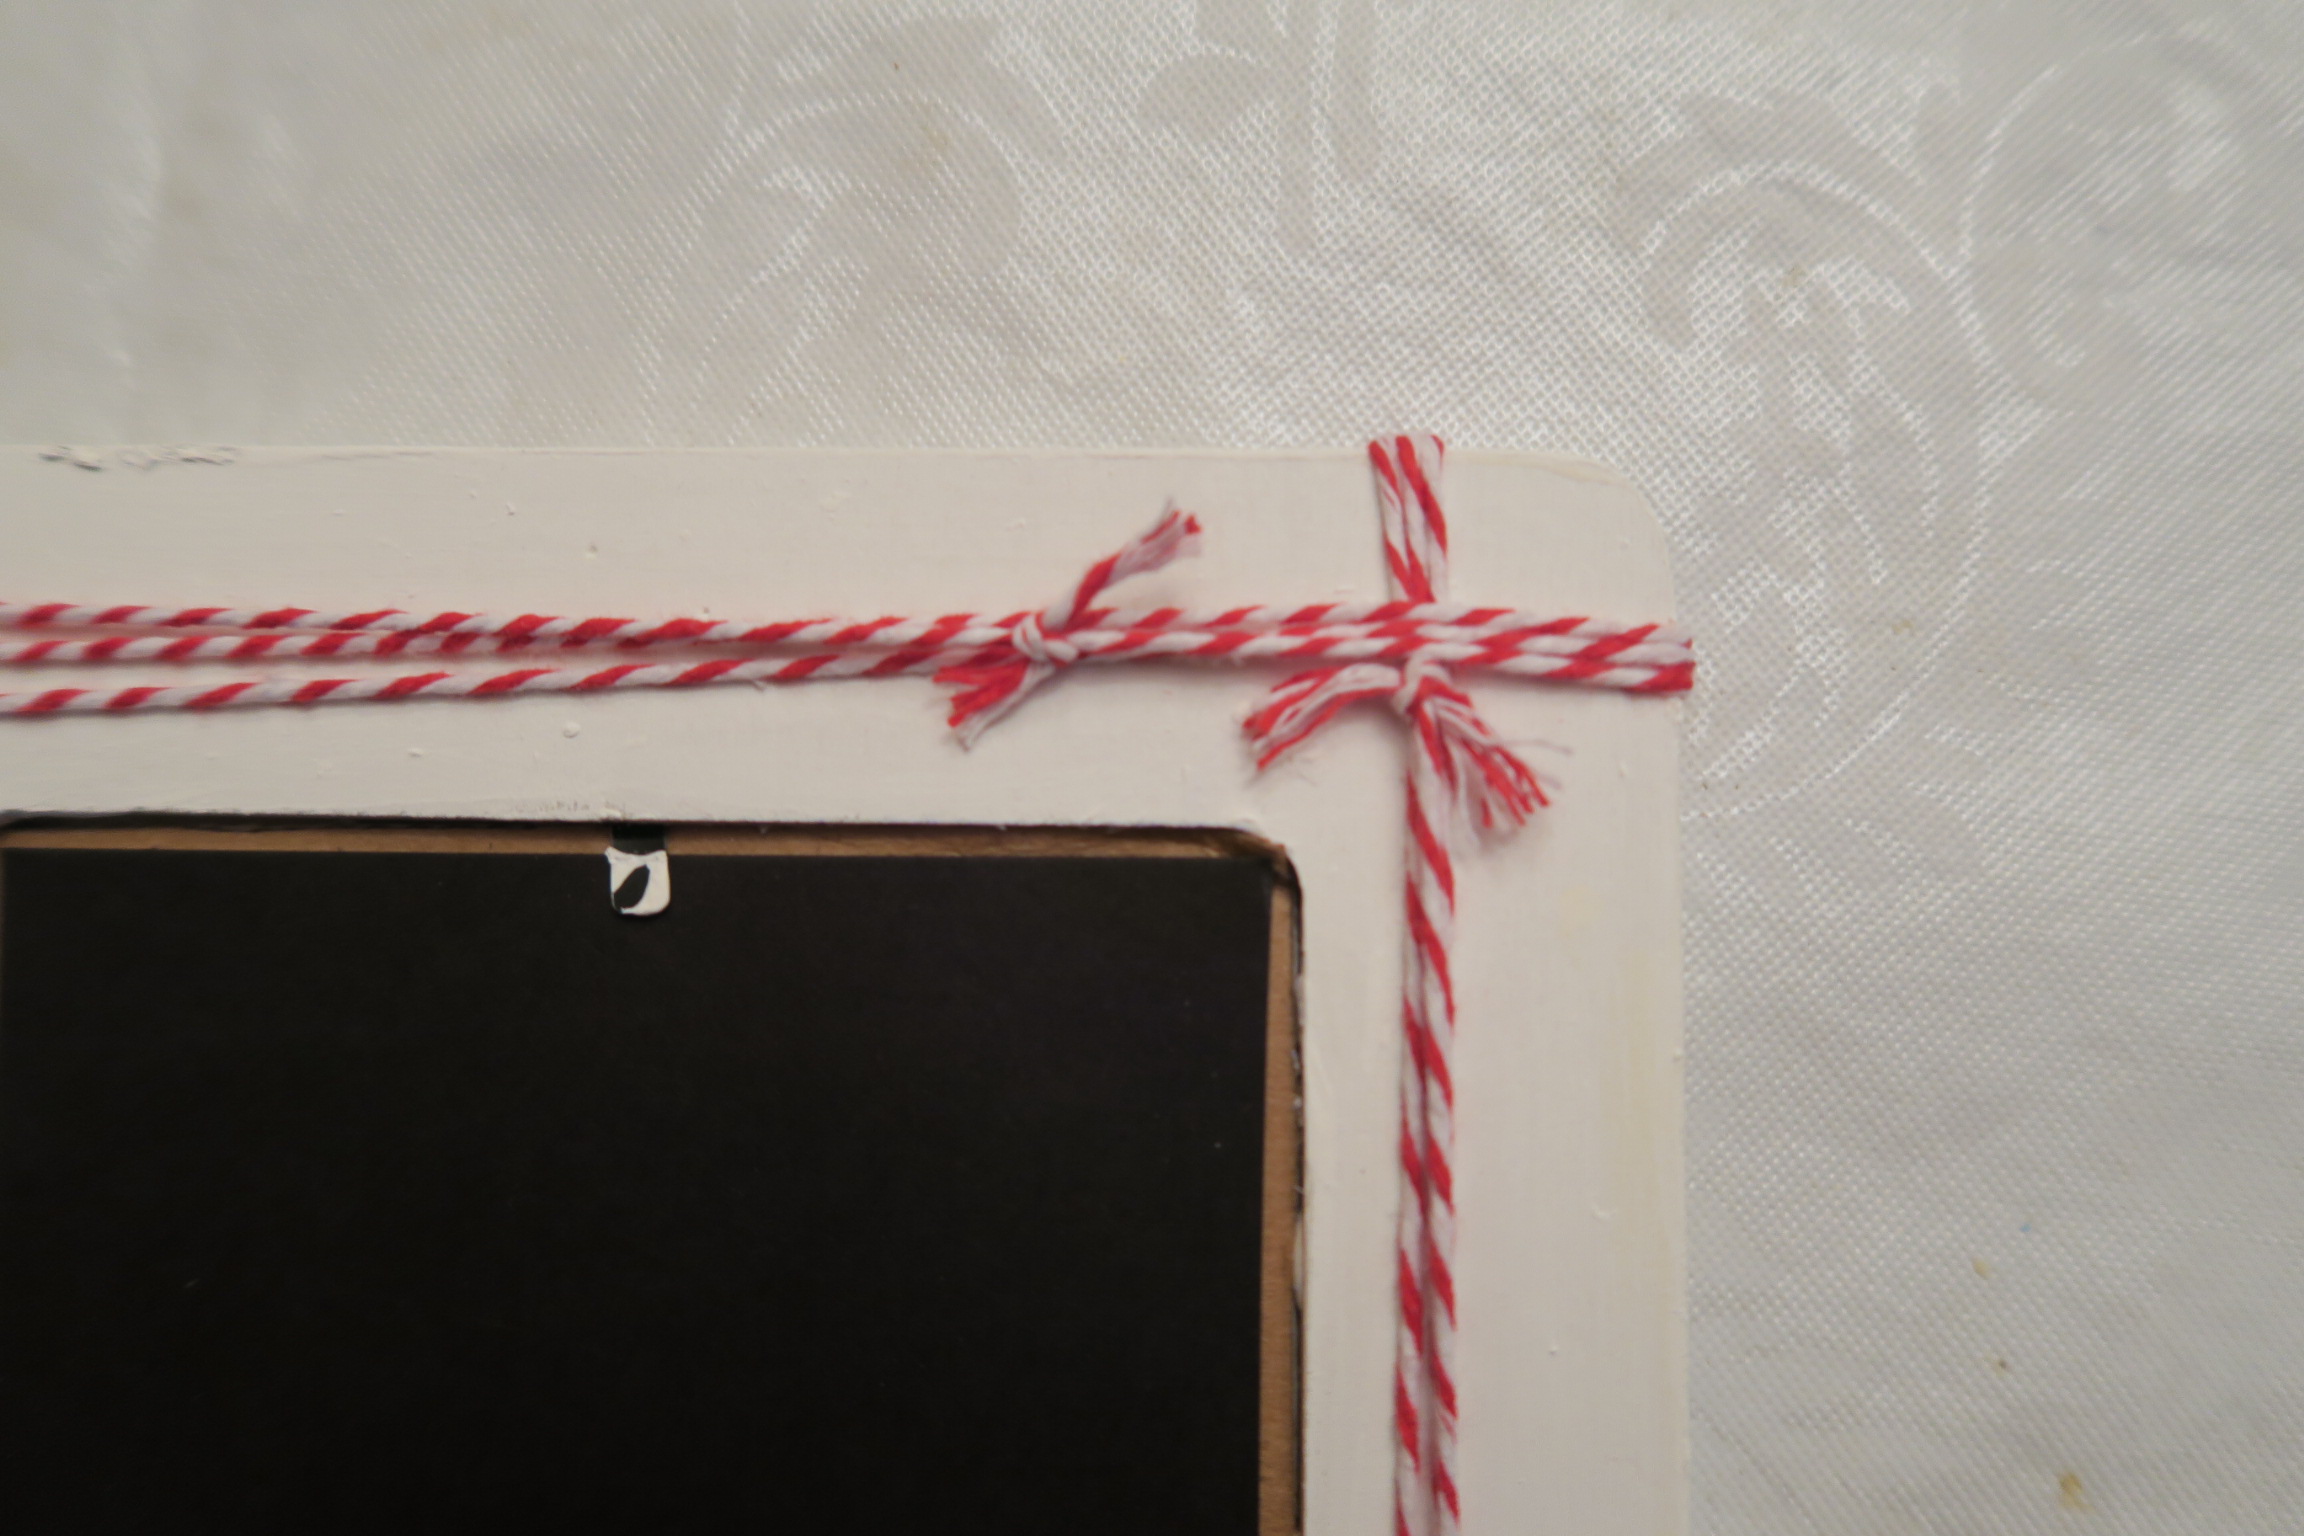
  4.  Wrap 3 strands of butchers twine around the top of the frame.  Tie in the back of the f  frame
  5.  Wrap 3 strands of butchers twine around the left side of the frame.  Tie in the back of  the frame.
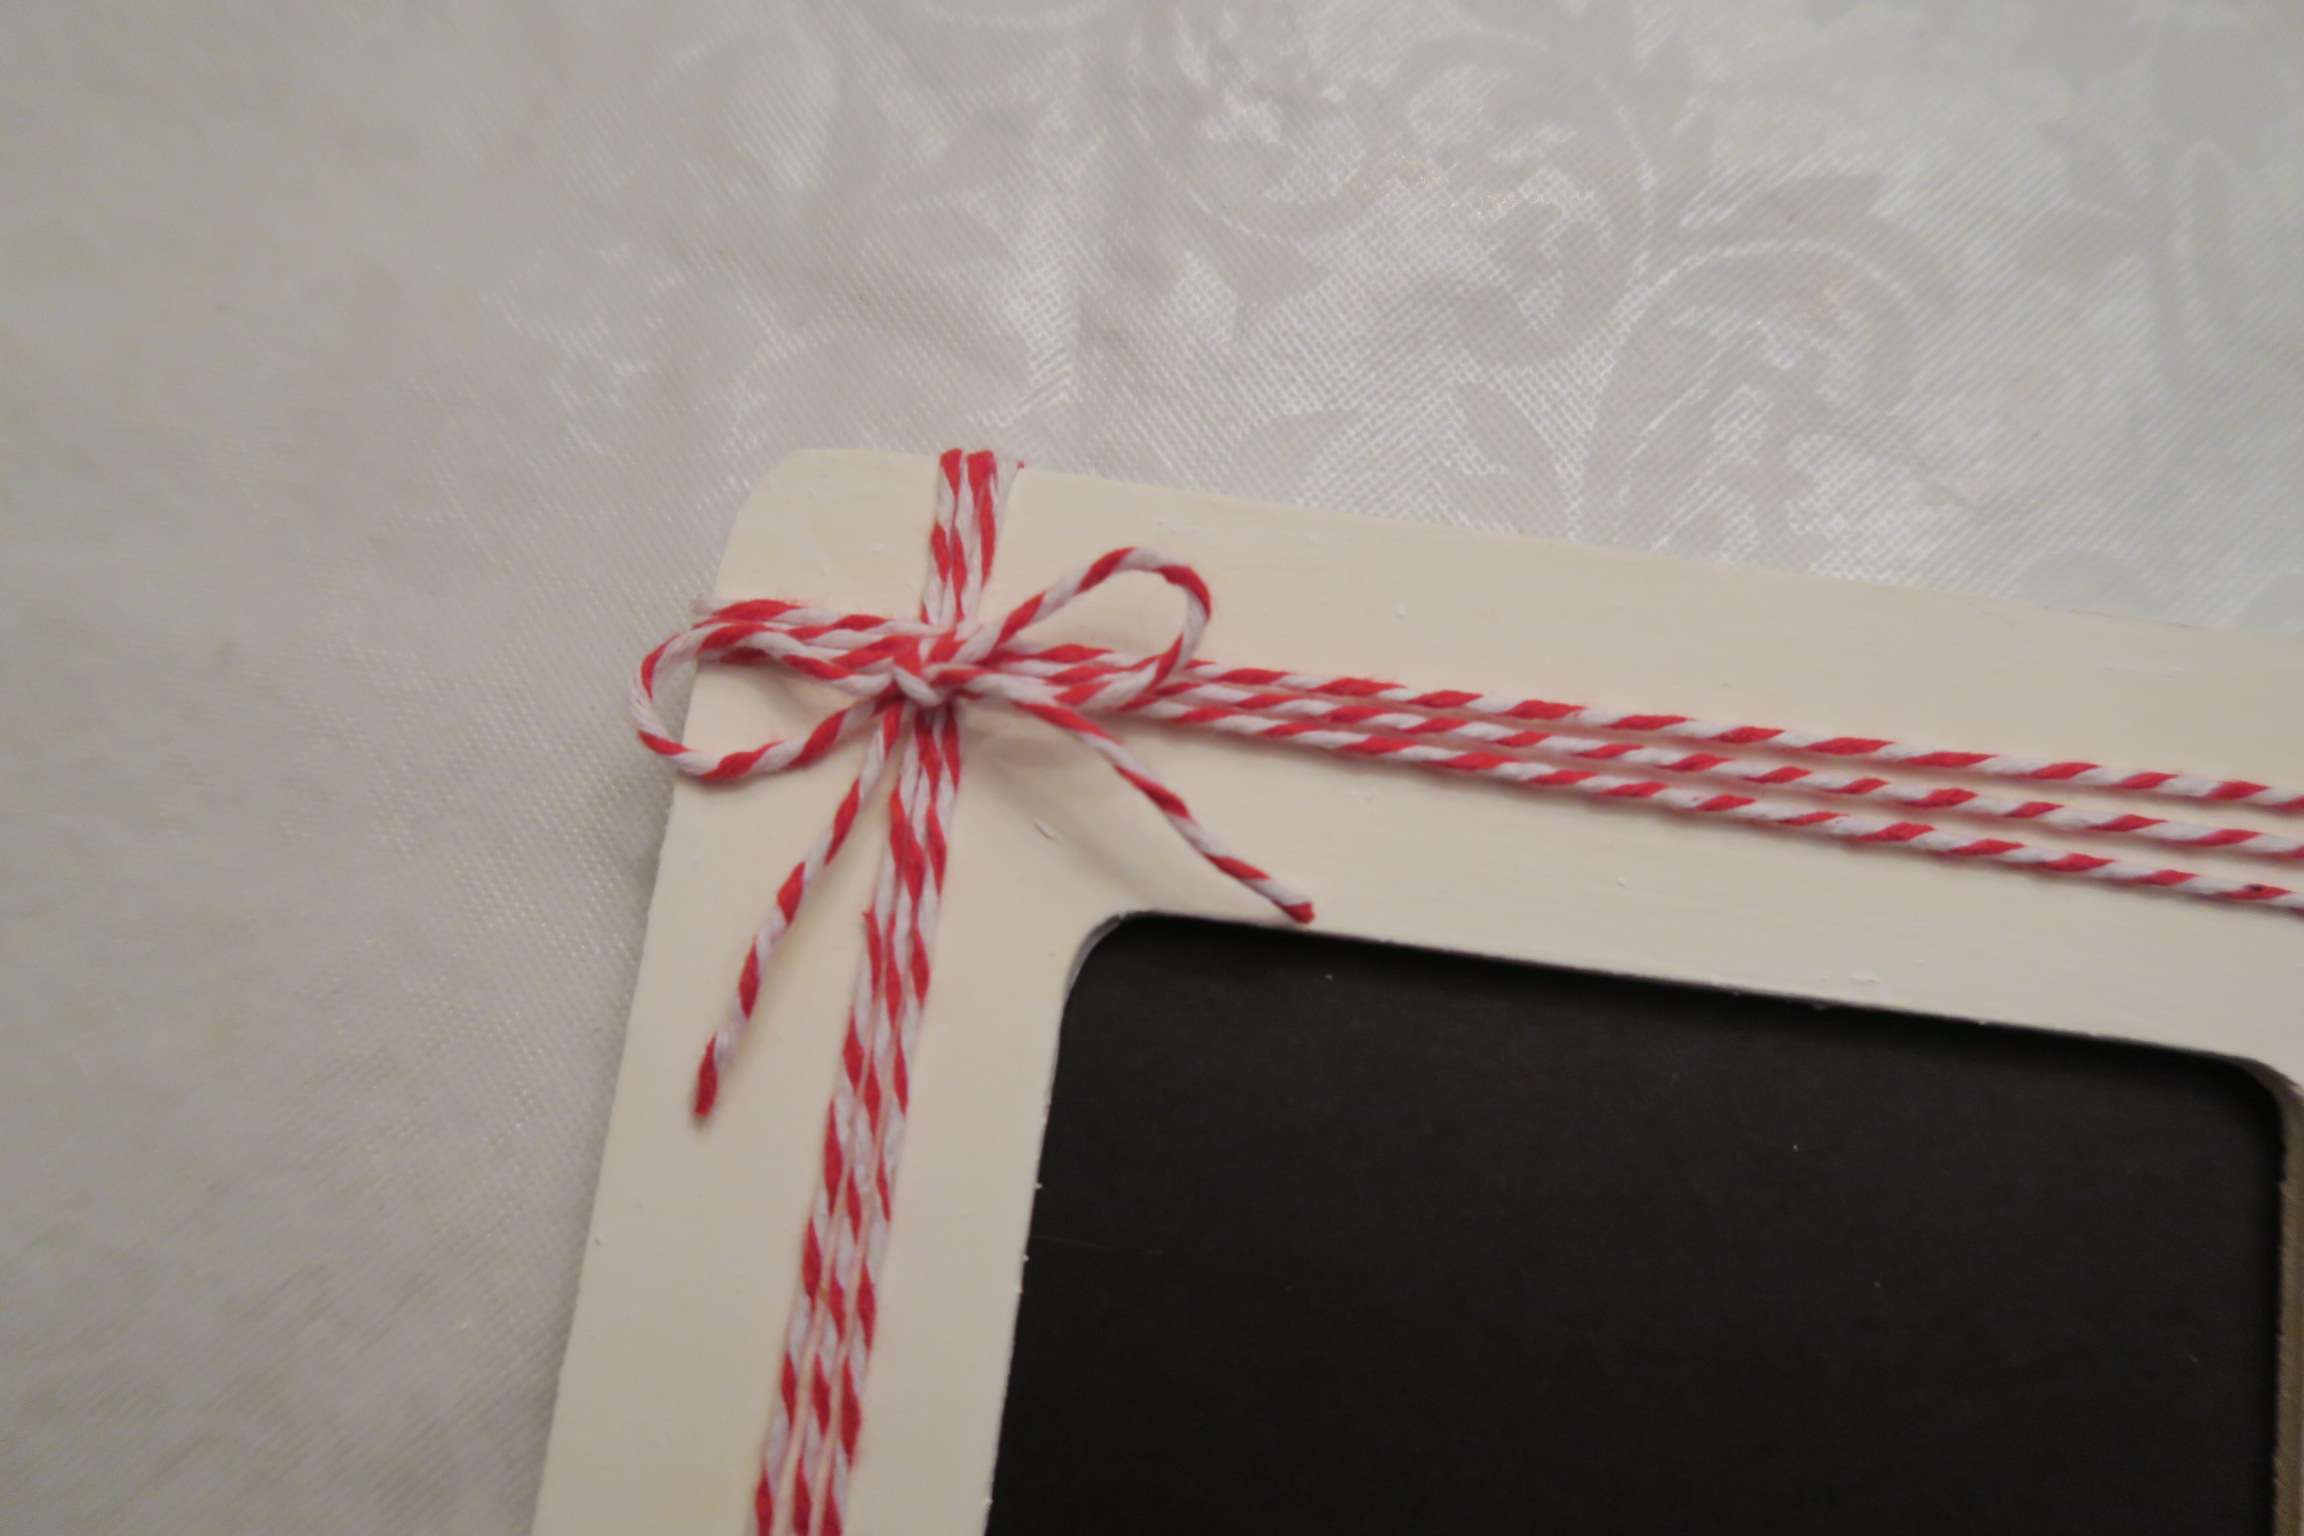
  6.  Place a piece of butchers twine in the left corner of the frame underneath the rows of  butchers twine that was wrapped around both sides.  Make a bow around the twine  that was wrapped around each side of the frame.
  7. Glue the hearts in place.  Let the glue dry


Valentine Heart Back

Valentine Heart Bow


There is lots of variation to this project.  Here are some options

Heart Variations

Wood Hearts

Paper Punch Hearts

Stencils

Stamps

Stickers

Butcher’s Twine Varations

Butchers Twine

Raffia

Twine

Ribbon

Thin gauge wire

Valentine Heart Finish


Print Friendly, PDF & Email

I Love You Picture

posted in: Crafts | 0

Valentine ILU FinishWhat a cute little picture.  It is so simple, but says it all.  Wouldn’t your loved ones be surprised to find this picture on their desk on Valentine’s Day.  Why not surprise someone with it.


This is one of those last minute crafts that take less than an hour and about $5 to make, but your loved ones will remember it forever.  This would also make a great addition to your Valentine’s Day table.  


Supplies

1 Picture Frame – I bought this one at Michaels for $1.

White and Red cardstock

Red marker or stamps and red paint or ink pad

Red hearts – These can be paper, drawn, stickers or stamps.  I used a heart punch.

Bow – Any small red ribbon or twine will do

Craft Glue


Instructions

  1.  Cut a piece of red card stock for the background and insert into picture frame.  
  2.  Cut 3 white hearts.  I used a heart punch, but you can cut them out with a scissor.  
  3.  Draw, stamp, stencil I Heart U on each heart. 
  4.  Fold the hearts in half and glue them together, overlapping the first and second heart  at the tip.
  5.  Glue the hearts onto the red card stock at the fold.
  6.  Using a punch, stencil, stamp or sticker, put three hearts at the bottom right edge of  the frame.
  7.  With the ribbon, make a bow and glue it to the top left corner of the frame.

Valentine ILU Finish


Print Friendly, PDF & Email

Valentine’s Day

posted in: Crafts | 0

Red Felt Heart Close

Valentines Day.  The day to celebrate love for the special people in your life.  Some feel that this should be strictly between a man and woman, but many give gifts to lots of people and pets that they love.  I have been giving gifts to my husband, children and now grand children for years.  Nothing extravagant, candy, baked goods and a small token of my love for them.  Even if you don’t exchange anything, spend time with the ones you love on February 14, and every day.  Give them a call.  Anything you do will be greatly appreciated.  

Here are some fun facts about Valentine’s Day.  

There are lots of legends surrounding St. Valentine, however all the stories surrounding him show him as a sympathetic, heroic and most importantly, a romantic figure. Valentine’s greetings were popular dating as far back as the Middle Ages.  Written Valentines appear after 1400.  St. Valentine sent the first Valentine greeting and signed it…”from your Valentine”.  

In Victorian times, it was considered to be bad luck if you put your name on the Valentine. X symbol became synonymous with the kiss in medieval times.  People who couldn’t write their names, signed with an X in front of a witness, then kissed the X to show sincerity. 

In the Middle Ages young men and women drew names from a bowl to see who would be their Valentine.  They would wear the name pinned onto their sleeves for everyone to see. This was the origin of the expression “to where your heart on your sleeve”.

In 1537, England’s King Henry VII officially declared February 14th the holiday of St. Valentine’s Day.

Richard Cadbury produced the 1st box of chocolates for Valentine’s Day in the late 1800’s

More than 35 million heart-shaped boxes of chocolate will be sold for Valentine’s Day

73% of Men buy flowers and 27% of women buy them.  15% of women send themselves flowers on Valentine’s Day

The red rose was the favorite flower of Venus, the Roman goddess of love

Red roses are considered the flower of love because the color red stands for strong romantic feelings

Teachers will receive the most Valentine’s Day cards followed by children, mothers, wives, sweethearts and pets

220,000 is the average number of wedding proposals on Valentine’s Day per year

Every Valentine’s Day, the Italian city of Verona, where Shakespeare’s Romeo & Juliet lived receives about 1,000 letters addressed to Juliet 


Print Friendly, PDF & Email