Basic Burlap Wreath

posted in: Crafts, Home Decor | 0

Burlap Wreath FinishThis is a basic burlap wreath.  It’s a staple for almost any style decor.  It’s a neutral color that can be enhanced with ribbons and embellishments.  Once you have the basic wreath, the ribbons and embellishments can be changed to match your decor, seasons and holidays.


Supplies

Metal Wreath Form

Burlap

Wire or Glue Gun


Instructions

Burlap Wreath1


Attach the burlap to the wreath form.  You can use a piece of wire or you can fold over the end and use a glue gun to secure the end. 

Burlap Wreath2


Now, this part is a little tricky.  Pull the burlap up into the first ring of the wreath form approximately 1 1/2 inch above the form to make a loop.  Pull the burlap into the second ring, then the third so you have burlap 3 loops.  

Burlap Wreath3


Now, you need to push the three burlap loops to the end of the wreath.  Turn the wreath to the back and twist the burlap so it stays in place.  Repeat the process of making three loops, twisting the burlap,  then pushing them to the end.  Fill the entire wreath form in the same manner until it is completely full with burlap loops.  


When the entire wreath is full, secure the end around one of the metal rings from the wreath and secure the end with a piece of wire or with a hot glue gun.
Heart Picture

posted in: Crafts | 0

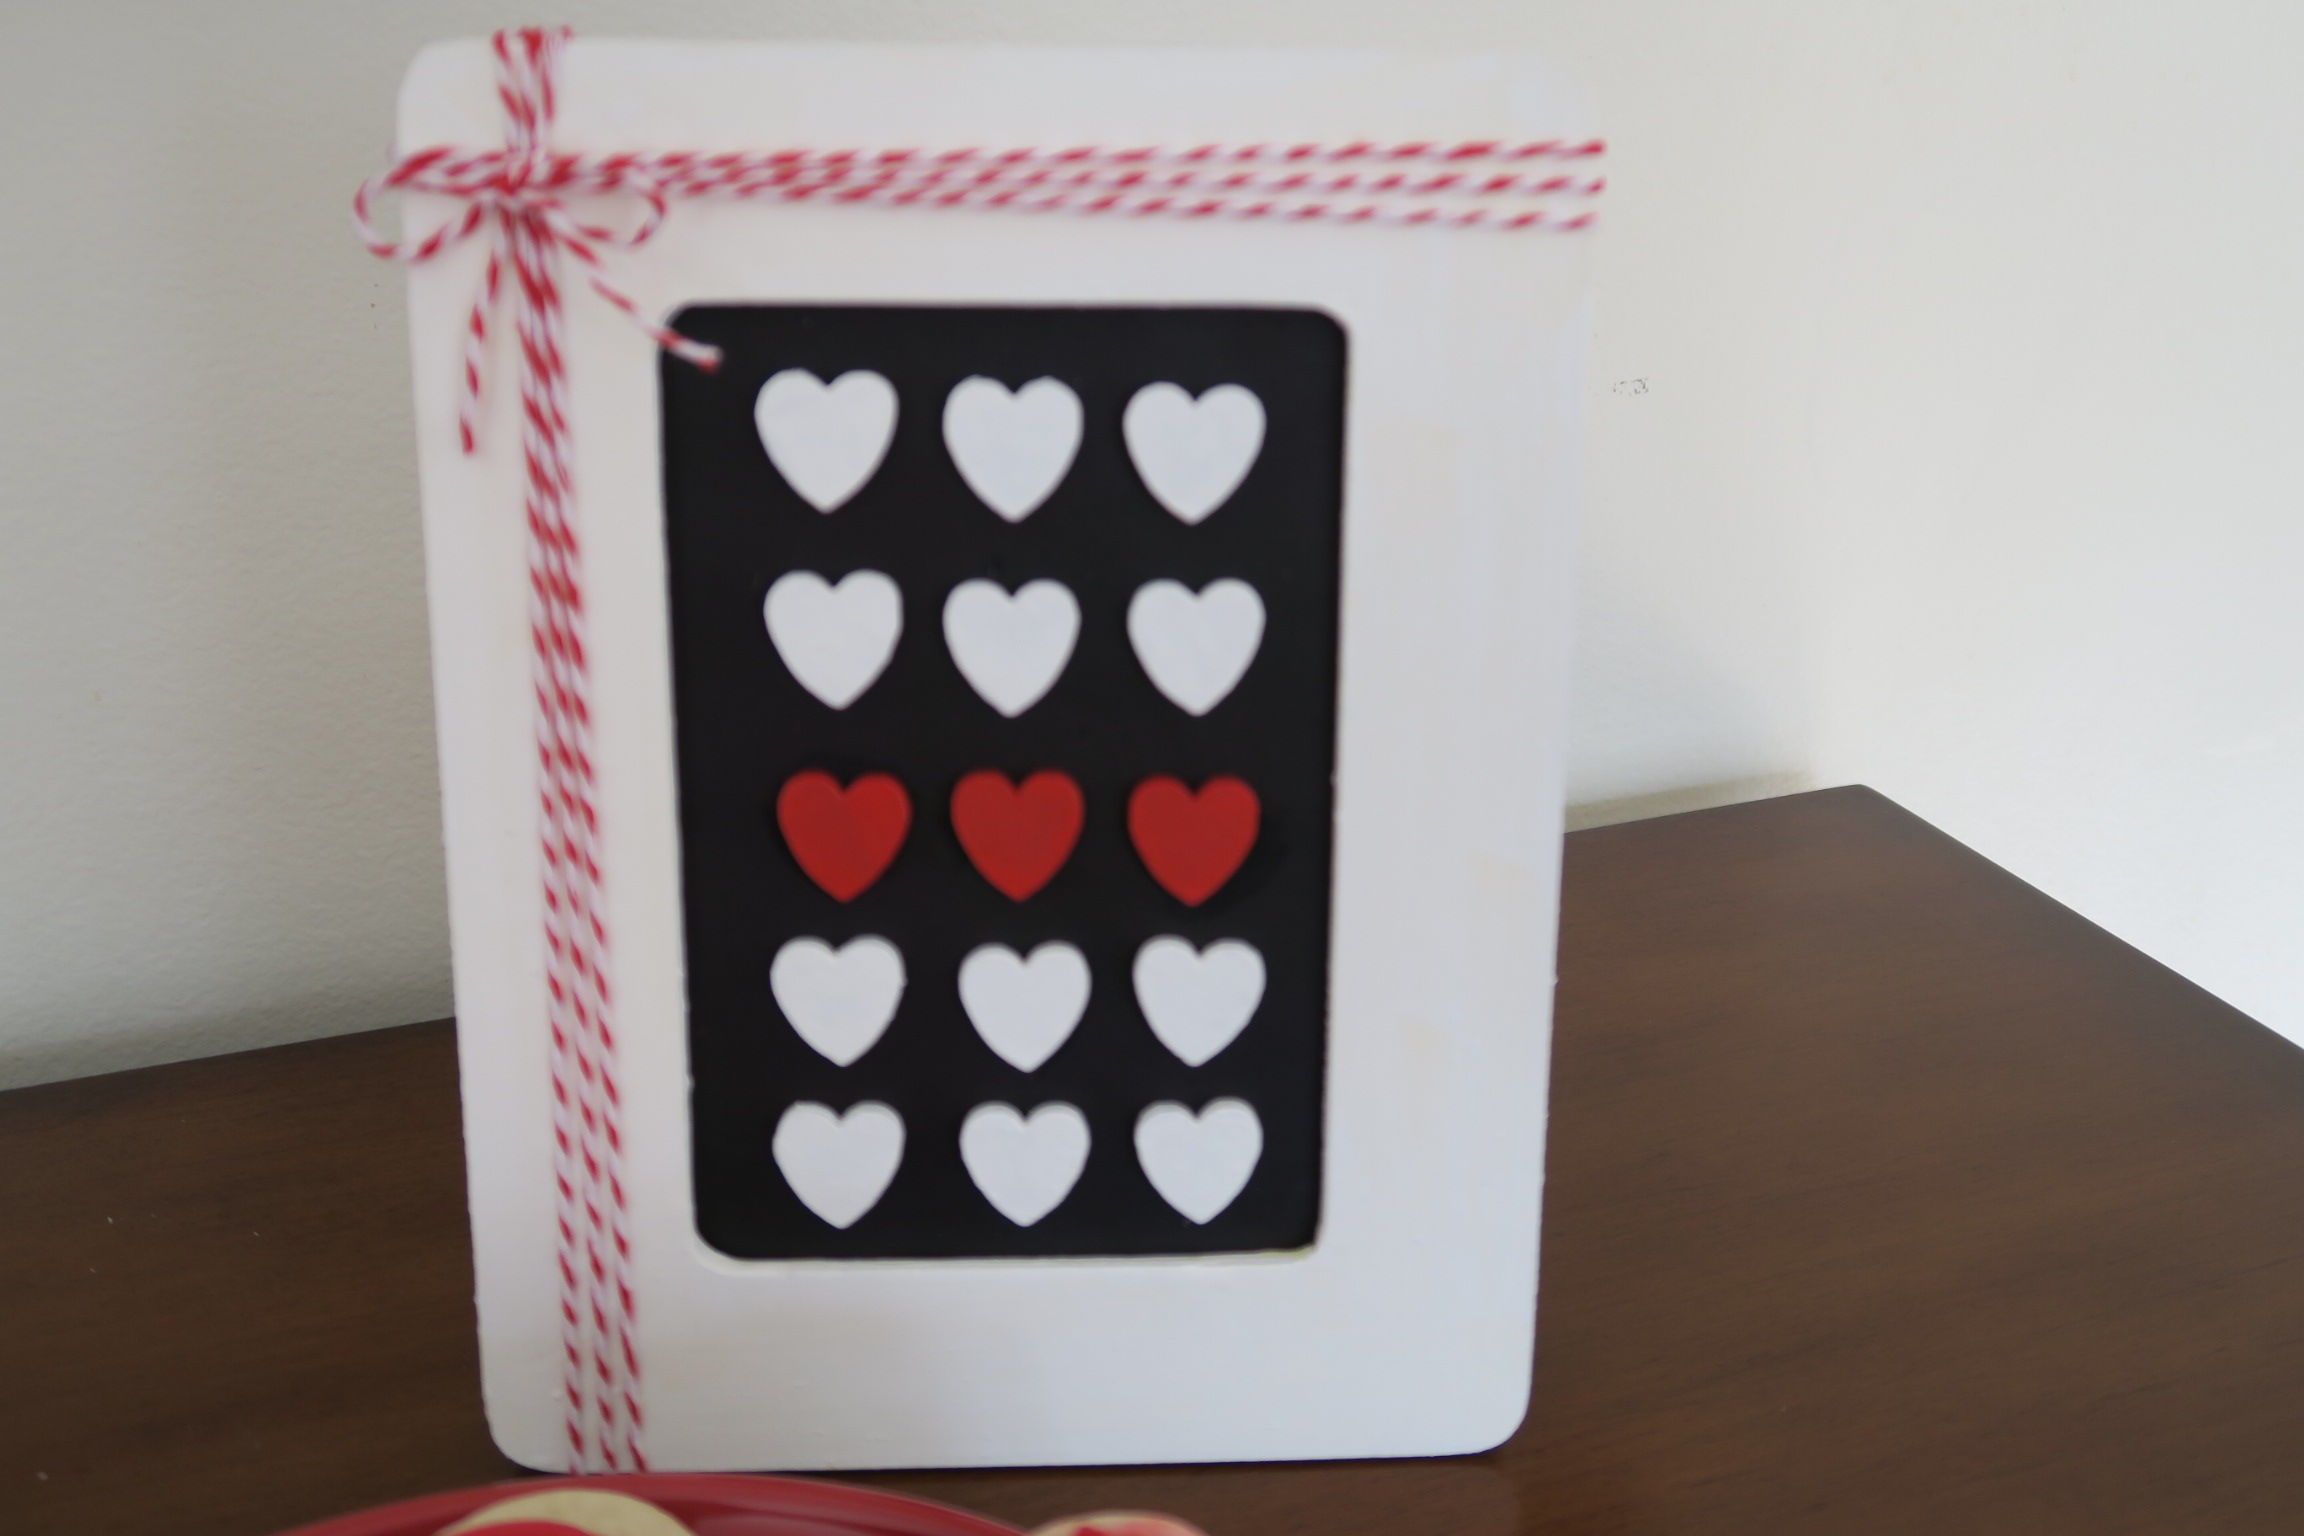
Valentine Heart FinishWhat a simple picture.  You can change the colors to go with any color scheme, or just make it red and white and display it around Valentine’s Day.  Simple and easy, it doesn’t get better than that.


Supplies

Picture Frame – I got this one for $1 at Michaels

White Craft Paint

Red Craft Paint

2 Paint Brushes

15 Wood Hearts

Bakers Twine

Black Card Stock

Craft Glue


Instructions

  1.  Paint the frame white.  Let dry completely
  2.  Cut 2 pieces of black card stock to fit the opening in the front and back of the frame.  Put in the frame.
  3.  Paint 12 hearts white and 3 hearts red.  Let dry completely
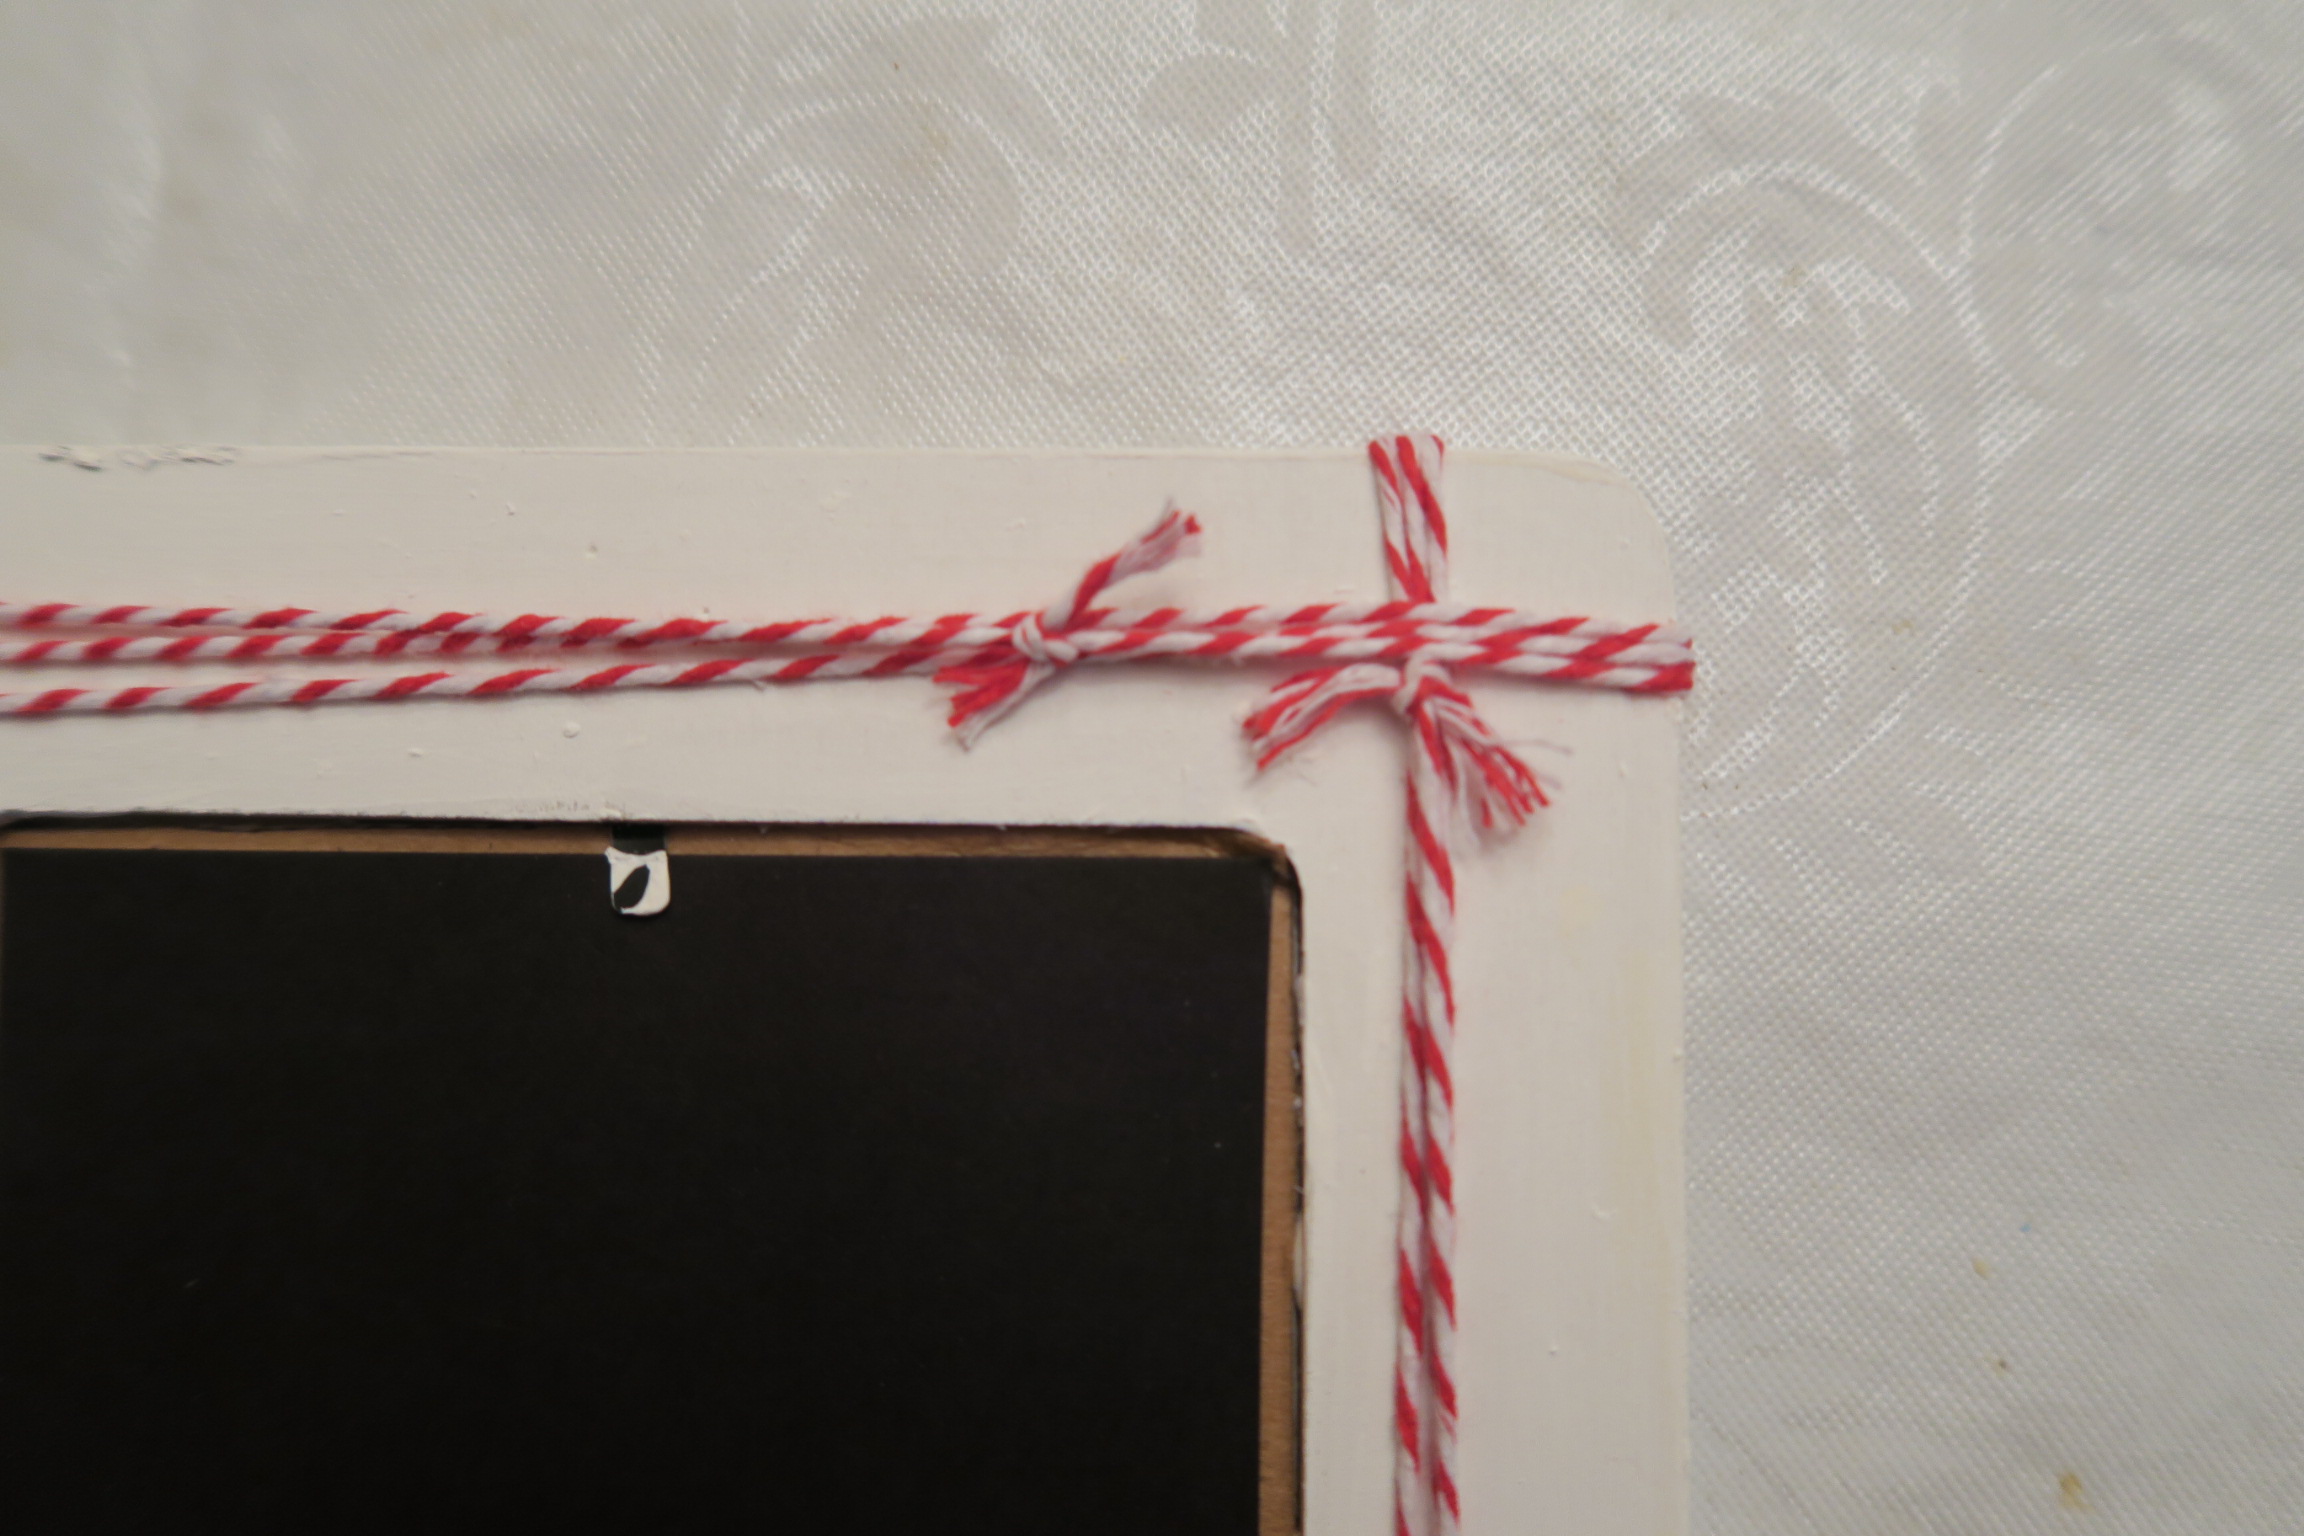
  4.  Wrap 3 strands of butchers twine around the top of the frame.  Tie in the back of the f  frame
  5.  Wrap 3 strands of butchers twine around the left side of the frame.  Tie in the back of  the frame.
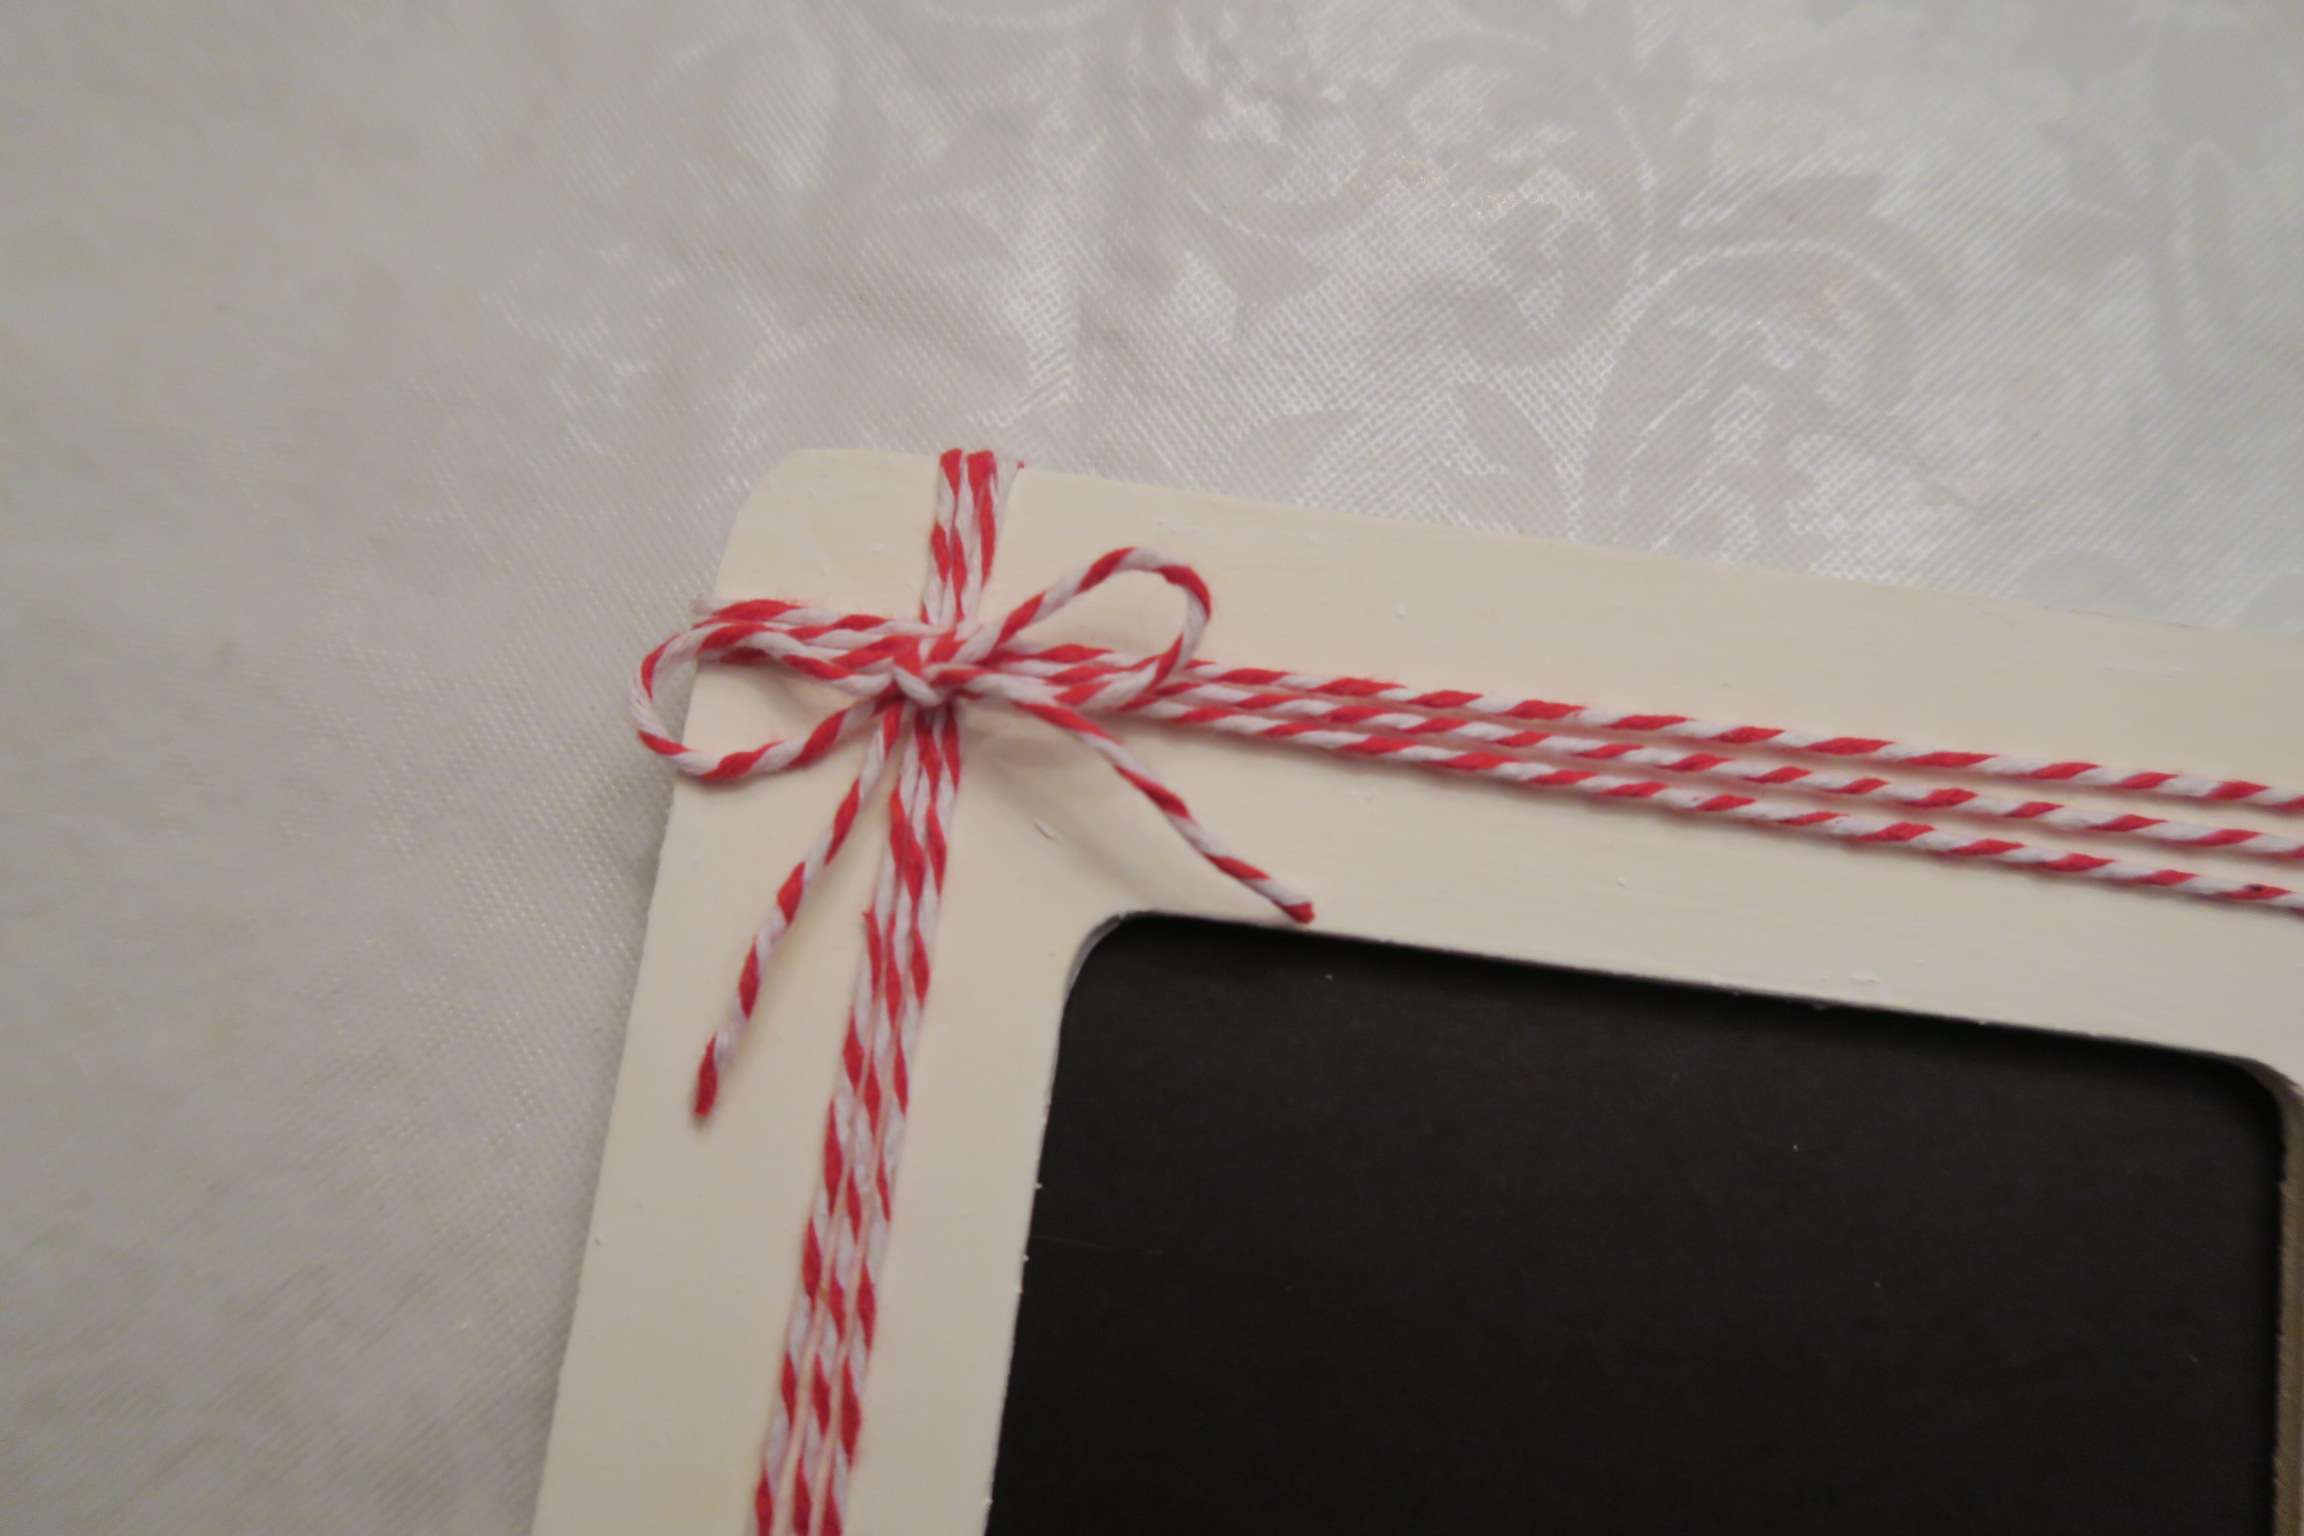
  6.  Place a piece of butchers twine in the left corner of the frame underneath the rows of  butchers twine that was wrapped around both sides.  Make a bow around the twine  that was wrapped around each side of the frame.
  7. Glue the hearts in place.  Let the glue dry


Valentine Heart Back

Valentine Heart Bow


There is lots of variation to this project.  Here are some options

Heart Variations

Wood Hearts

Paper Punch Hearts

Stencils

Stamps

Stickers

Butcher’s Twine Varations

Butchers Twine

Raffia

Twine

Ribbon

Thin gauge wire

Valentine Heart Finish


I Love You Picture

posted in: Crafts | 0

Valentine ILU FinishWhat a cute little picture.  It is so simple, but says it all.  Wouldn’t your loved ones be surprised to find this picture on their desk on Valentine’s Day.  Why not surprise someone with it.


This is one of those last minute crafts that take less than an hour and about $5 to make, but your loved ones will remember it forever.  This would also make a great addition to your Valentine’s Day table.  


Supplies

1 Picture Frame – I bought this one at Michaels for $1.

White and Red cardstock

Red marker or stamps and red paint or ink pad

Red hearts – These can be paper, drawn, stickers or stamps.  I used a heart punch.

Bow – Any small red ribbon or twine will do

Craft Glue


Instructions

  1.  Cut a piece of red card stock for the background and insert into picture frame.  
  2.  Cut 3 white hearts.  I used a heart punch, but you can cut them out with a scissor.  
  3.  Draw, stamp, stencil I Heart U on each heart. 
  4.  Fold the hearts in half and glue them together, overlapping the first and second heart  at the tip.
  5.  Glue the hearts onto the red card stock at the fold.
  6.  Using a punch, stencil, stamp or sticker, put three hearts at the bottom right edge of  the frame.
  7.  With the ribbon, make a bow and glue it to the top left corner of the frame.

Valentine ILU Finish


Broccoli Stromboli

posted in: Cooking, Starters | 0

Stromboli Broccoli1I made this variation of my typical meat and cheese Stromboli because we had some vegetarians for dinner.  I got rave reviews.


Ingredients

1 Pizza Dough

2 Lbs Broccoli Florets

1/4 Cup Olive Oil

3 Cloves Garlic

1 Egg

Cooking Spray


Instructions

Drop the broccoli florets in salted boiling water for 3 minutes.  Immediately plunge in ice bath.  In the same pot, add the olive oil and the garlic.  Cook the garlic in the oil for 3-5 minutes on medium heat.  Add the broccoli to the oil and stir, completely coating every piece of broccoli.  Add salt to taste.  


Stromboli Broccoli

Roll out the pizza dough until it is rectangular in shape.  You can do this with a rolling pin, or with your hands.  If you are using your hands, stretch it in the direction that you want. Working with the dough is very forgiving, if it breaks, just pinch it back together.  Put the cooked broccoli on the dough, leaving about 1/2 inch to 1 inch on all sides. 


Roll the dough from the long side, pushing the broccoli in place as you go.  If you have an extra amount of dough at the end, you can cut it off and discard it, or you can roll it thin and place it on top so you have a little more dough on the Stromboli.  


Bake the Stromboli in a 400º oven for 45-50 minutes, or until the crust is golden brown.

Stromboli Broccoli2


Meat and Cheese Stromboli

posted in: Cooking, Starters | 0

Stromboli DoneThis Stromboli is amazing.  When I put this out, it is devoured within minutes.


Ingredients

Pizza Dough – you can get this from your local pizza place or from the grocery store.  Mine sells it in the dairy case.

1/2 lb each Cheese – I used sliced mozzarella and sliced provolone. 

1/2 lb each Meat – On this one, there is sliced pepperoni, ham and salami.  

1 Egg


Stromboli1The first thing you need to do is roll out the dough until it is rectangular in shape. You can use a rolling pin or just stretch it with your hands.  I did this one by hand.  Its easy and fast that way.

Then you start adding the meat and cheese.  I started with the Salami, then added everything else.

Stromboli2Now I have everything piled on and it’s time to roll it up.  Unfortunately, I didn’t take a picture after I rolled it.  Sorry.  I’ll try to remember to take it next time.  You know there’ll be a next time, because I love these.  Anyway, roll it long ways.  It’s easy to roll, everything stays together.  At the end, put the seam side down on a baking sheet sprayed with cooking spray.  

Make an egg wash of 1 egg and a tablespoon of water and brush on the entire Stromboli roll.

Bake it in a 400º oven for 45-50 minutes or until it is golden brown. 

Stromboli Done1Wow, that looks scrumptious.  I can’t wait to make it again.


Instructions

Roll out your pizza dough until it is rectangular in shape.  Add the meat and cheese layering each one.  Roll the dough from the long side of the rectangle.  Place seam side down on a cooking sheet sprayed with cooking spray.  Brush an egg wash on the entire Stromboli.  Bake in a 400º oven for 45-50 minutes, or until the crust is golden brown.